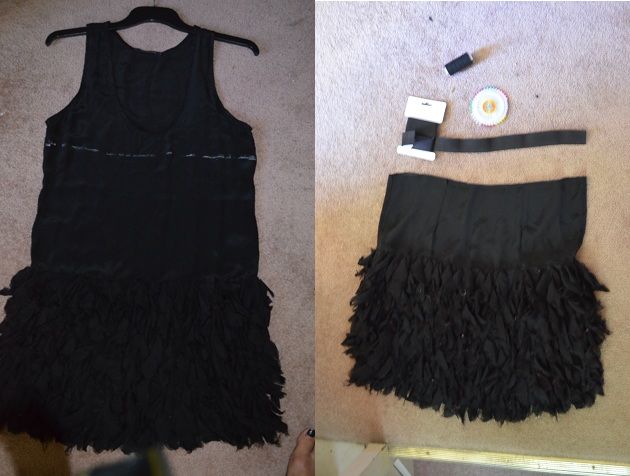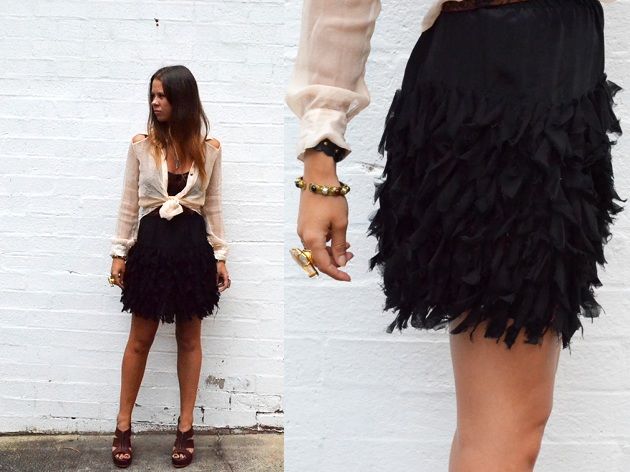
So as my first official DIY project for BWA I decided to take a dress and turn it into a skirt. The dress I chose this particular dress I was not a fan of the top half, and it works as a skirt much better with my wardrobe. This DIY can be achieved with any dress however be very sure before you take the big snip!
What you will need
– Sewing Machine
– Matching Thread
– Black or White 1 inch Elastic
– Pins
– Scissors
– Chalk
– Tape Measure
STEP 1. Cutting the Skirt
Measure and chalk out where you would like to cut the skirt, making sure you leave 1 inch for seam allowance for when you attach the elastic. I cut higher than the desired length, and made adjustments just so I got the exact end length right. Once you are happy cut away.
STEP 2. Cutting the Elastic
Measure and cut the elastic to where you would like it to sit on your body. I went for the waist with mine but you could go lower or higher. Remember to allow for a 1.5cm crossover for when you sew it together.
STEP 3. Sewing the Elastic
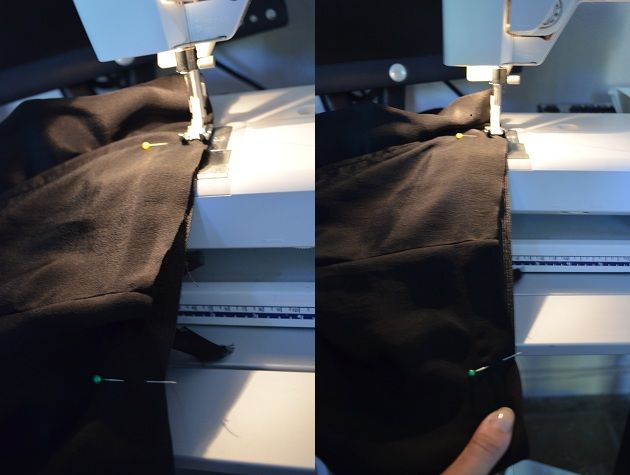
Sew, using a zig zag stitch, the 2 ends of the elastic together to create a loop overlapping about 1.5cm. Go over the stitch a few times to make sure it holds together.
Divide the elastic into quarters and place a pin at each point. Do the same with the cut edge of the skirt. Depending on your size you should find that the elastic is a bit smaller than the circumference of the skirt.
STEP 5. Pinning the Elastic to the Skirt
Attach the elastic to the inside of the skirt matching the pins at each quarter of the elastic and skirt.
STEP 6 Sewing the Elastic to the Skirt.
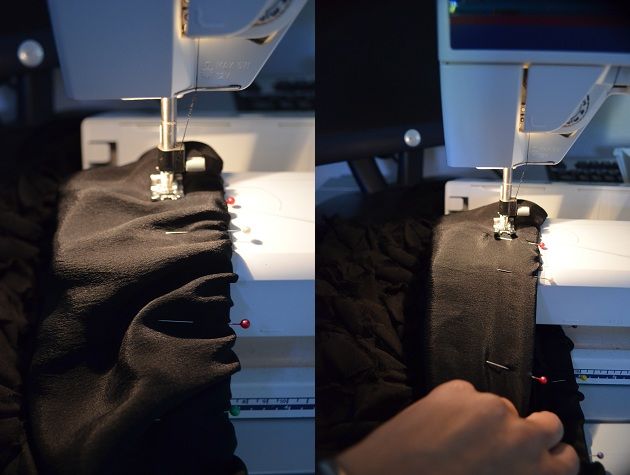
Using a straight stitch, place the foot at the start of one of the pins, then you will need to stretch/pull the elastic so that the fabric sits flat against it. Keeping the fabric on top of the elastic, you may begin sewing doing each quadrant at a time. Make sure you run the edge of the foot along the edge of the fabric and elastic. You can use an over-locker for this process if you have one.
STEP 7 Pinning the Elastic down
Once complete you can then fold the elastic over once onto the inside and pin down, making sure the fabric stays even and doesn’t slide.
You can now sew the elastic down so it sits flat. This is similar to step 6 however you will need to make sure you leave the right allowance to catch the elastic to the fabric 3/4 inch is perfect for 1 inch elastic, putting a pen mark on your sewing machine as a guide to run the edge along can help. Stretch the fabric as you are sewing to make sure the fabric doesn’t buckle. You may want to guide the other end through to allow for smooth even sewing.
Trim back any loose threads and you are done!


44 Comments
Effective transformation.
Thats such a fantastic idea
Cool
DIYs are the best!!
hi where can you buy this dress? thanks
This is sooooo super cool! 🙂 x
Looks so fun, if I don’t win the giveaway, I’ll find my own materials.
my mum has done this for me before 🙂
Wow, you’re so creative!
Fantastic
I LOVE it
What a great idea 🙂 🙂 🙂
WOW
Great idea, ugly skirt
you make it look so simple!
love how the ruffles on this skirt look like featherS!
Definitely need to show my 14 year old daughter, she will LOVE this!
great DIY article!
beautiful tutorial!
loving these diy!
oooo awesome!
Excellent guide and nice end result, well done and thanks.
Cute:)
Looks good!
I have converted dresses to skirts, they look great
Wow, cute~
great idea!!
This is such a great idea!
Very cute!
coolbeans
If only I was any good at sewing lol…
love the diy
such a great idea since we all have pieces that would work better as a skirt!!! you probably saved at least four dresses from my charity bin…lol
This looks gorgeous!
amazing, well done, much better as a skirt
Definitely have a few items i could revamp!!
Brilliant!…I’ve done this…some items I love too much to discard and restyled… 😎
It’s a very gorgeous skirt. I love it!
adorable and a lovely tutorial to try out sometime!
Really easy to follow tutorial, thanks!
That was VERY brave…I love a nice bit of recycling!
nice
super cute!
Wow, looks great! I love when you can re-vamp a clothing item in your wardrobe…. Well done! 😉
absolutely